

PyQt5如何实现拖放功能?实例教程详解。
- 内容介绍
- 文章标签
- 相关推荐
本文共计933个文字,预计阅读时间需要4分钟。
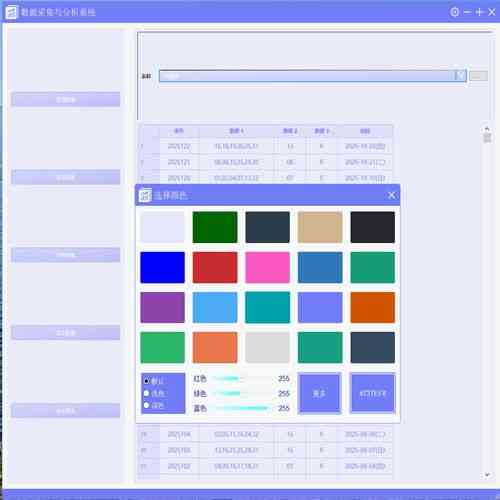
本篇,我们学习PyQt5界面中拖放(Drag+Drop)控件。拖放操作在GUI中,指的是点击一个对象,并将其拖动到另一个对象上。例如,百度云PC客户端支持拖放文件,以便快速移动文件。
本篇,我们学习PyQt5界面中拖放(Drag 和Drop)控件。
拖放动作
在GUI中,拖放指的是点击一个对象,并将其拖动到另一个对象上的动作。比如百度云PC客户端支持的拖放文件以快速移动文件:
拖放动作能够很直观很方便的在GUI程序中完成一些很复杂或繁琐的操作。
在PyQt中实现拖放
在PyQt5中,我们也可以很轻松地使用拖放功能。
使用Qt设计师或者使用API都可以实现。我们先使用Qt设计师将GUI的图形设计出来,在之前的GUI的基础上,我们新建一个选项卡。
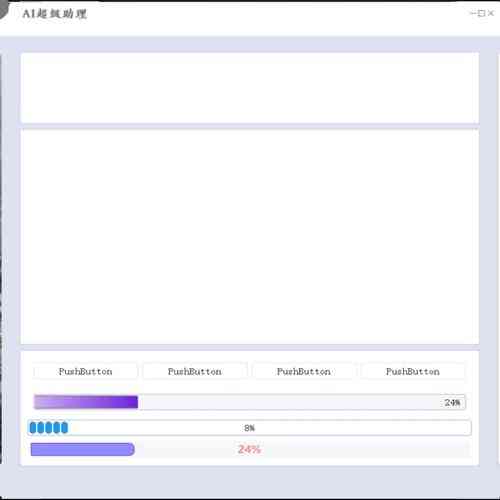
我们新建了一个选项卡,然后在里面放置了一个LineEdit部件,一个PushButton部件,两个ListWidget部件。
对于简单的拖放效果,我们可以直接使用Qt设计师中的选项进行设置。例如,我们直接可以使用dragEnable属性、dragDropOverwriteMode属性、dragDropMode属性为ListWidget部件设置拖放功能:
而一些稍微复杂的拖放功能,就需要编写Python逻辑处理代码来完成了。
我们先将UI文件保存并转换为Python文件。
pyuic5 -o conplex_window_drag.py conplex_window.ui
然后,新建一个Python文嘉drag.py,在文件中引入刚刚转换好的Python文件:
# coding:utf-8 # 州的先生 zmister.com Python GUI教程 from PyQt5 import QtCore,QtWidgets,QtGui from GUI import conplex_window_drag import sys import time class MainWindow(object): def __init__(self): app = QtWidgets.QApplication(sys.argv) MainWindow = QtWidgets.QMainWindow() self.ui = conplex_window_drag.Ui_MainWindow() self.ui.setupUi(MainWindow) self.update_date() self.update_calendar() self.set_lcd() self.set_dial() self.update_progressbar() self.set_font() MainWindow.show() sys.exit(app.exec_()) # 修改日期修改器数值 def update_date(self): self.ui.dateEdit.setDate(self.ui.calendarWidget.selectedDate()) # 日历信号槽 def update_calendar(self): self.ui.calendarWidget.selectionChanged.connect(self.update_date) # 设置LCD数字 def set_lcd(self): self.ui.lcdNumber.display(self.ui.dial.value()) # 刻度盘信号槽 def set_dial(self): self.ui.dial.valueChanged['int'].connect(self.set_lcd) # 州的先生 zmister.com # 按钮信号槽 def update_progressbar(self): self.ui.radioButton.clicked.connect(self.start_progressbar) self.ui.radioButton_2.clicked.connect(self.stop_progressbar) self.ui.radioButton_3.clicked.connect(self.reset_progressbar) self.progress_value = 0 self.stop_progress = False def progressbar_counter(self, start_value=0): self.run_thread = RunThread(parent=None, counter_start=start_value) self.run_thread.start() self.run_thread.counter_value.connect(self.set_progressbar) def set_progressbar(self, counter): if not self.stop_progress: self.ui.progressBar.setValue(counter) # 启动进度栏 def start_progressbar(self): self.stop_progress = False self.progress_value = self.ui.progressBar.value() self.progressbar_counter(self.progress_value) # 停止进度栏 def stop_progressbar(self): self.stop_progress = True try: self.run_thread.stop() except: pass # 重设进度栏 def reset_progressbar(self): self.stop_progressbar() self.progress_value = 0 self.ui.progressBar.reset() self.stop_progress = False # 字体选择 def set_font(self): self.ui.fontComboBox.activated['QString'].connect(self.ui.label.setText) class RunThread(QtCore.QThread): # 定义一个新的信号 counter_value = QtCore.pyqtSignal(int) def __init__(self, parent=None, counter_start=0): super(RunThread, self).__init__(parent) self.counter = counter_start self.is_running = True def run(self): while self.counter < 100 and self.is_running == True: time.sleep(0.1) self.counter += 1 print(self.counter) # 发出一个新值的信号 self.counter_value.emit(self.counter) def stop(self): self.is_running = False print('线程停止中...') self.terminate() if __name__ == "__main__": MainWindow()
运行代码正常:
接着,我们创建一个DragDropButton()类,用来处理按钮的拖放:
class DragDropButton(QtWidgets.QPushButton): def __init__(self, text, parent): super().__init__(text, parent) self.setAcceptDrops(True) def dragEnterEvent(self, event): if event.mimeData().hasFormat('text/plain'): event.accept() else: event.ignore() def dropEvent(self, event): self.setText(event.mimeData().text())
我们使用setAcceptDrops属性设置按钮接收拖放事件,创建一个dragEnterEvent()方法用来设置拖的事件响应,创建一个dropEvent()方法用来设置放的事件响应。
接着我们在MainWindow()主类中,调用它:
class MainWindow(object): def __init__(self): …… self.ui.pushButton.hide() self.pushButton = DragDropButton("拖放按钮",MainWindow) self.ui.gridLayout_5.addWidget(self.pushButton,0, 1, 1, 2) ……
最后,运行一下看看:
在上面的程序中,我们能够将文本拖放到按钮上。
好了python GUI库图形界面开发中PyQt5拖放控件的实例就是这些,更多关于python PyQt5 GUI库图形界面开发请查看下面的相关链接
本文共计933个文字,预计阅读时间需要4分钟。
本篇,我们学习PyQt5界面中拖放(Drag+Drop)控件。拖放操作在GUI中,指的是点击一个对象,并将其拖动到另一个对象上。例如,百度云PC客户端支持拖放文件,以便快速移动文件。
本篇,我们学习PyQt5界面中拖放(Drag 和Drop)控件。
拖放动作
在GUI中,拖放指的是点击一个对象,并将其拖动到另一个对象上的动作。比如百度云PC客户端支持的拖放文件以快速移动文件:
拖放动作能够很直观很方便的在GUI程序中完成一些很复杂或繁琐的操作。
在PyQt中实现拖放
在PyQt5中,我们也可以很轻松地使用拖放功能。
使用Qt设计师或者使用API都可以实现。我们先使用Qt设计师将GUI的图形设计出来,在之前的GUI的基础上,我们新建一个选项卡。
我们新建了一个选项卡,然后在里面放置了一个LineEdit部件,一个PushButton部件,两个ListWidget部件。
对于简单的拖放效果,我们可以直接使用Qt设计师中的选项进行设置。例如,我们直接可以使用dragEnable属性、dragDropOverwriteMode属性、dragDropMode属性为ListWidget部件设置拖放功能:
而一些稍微复杂的拖放功能,就需要编写Python逻辑处理代码来完成了。
我们先将UI文件保存并转换为Python文件。
pyuic5 -o conplex_window_drag.py conplex_window.ui
然后,新建一个Python文嘉drag.py,在文件中引入刚刚转换好的Python文件:
# coding:utf-8 # 州的先生 zmister.com Python GUI教程 from PyQt5 import QtCore,QtWidgets,QtGui from GUI import conplex_window_drag import sys import time class MainWindow(object): def __init__(self): app = QtWidgets.QApplication(sys.argv) MainWindow = QtWidgets.QMainWindow() self.ui = conplex_window_drag.Ui_MainWindow() self.ui.setupUi(MainWindow) self.update_date() self.update_calendar() self.set_lcd() self.set_dial() self.update_progressbar() self.set_font() MainWindow.show() sys.exit(app.exec_()) # 修改日期修改器数值 def update_date(self): self.ui.dateEdit.setDate(self.ui.calendarWidget.selectedDate()) # 日历信号槽 def update_calendar(self): self.ui.calendarWidget.selectionChanged.connect(self.update_date) # 设置LCD数字 def set_lcd(self): self.ui.lcdNumber.display(self.ui.dial.value()) # 刻度盘信号槽 def set_dial(self): self.ui.dial.valueChanged['int'].connect(self.set_lcd) # 州的先生 zmister.com # 按钮信号槽 def update_progressbar(self): self.ui.radioButton.clicked.connect(self.start_progressbar) self.ui.radioButton_2.clicked.connect(self.stop_progressbar) self.ui.radioButton_3.clicked.connect(self.reset_progressbar) self.progress_value = 0 self.stop_progress = False def progressbar_counter(self, start_value=0): self.run_thread = RunThread(parent=None, counter_start=start_value) self.run_thread.start() self.run_thread.counter_value.connect(self.set_progressbar) def set_progressbar(self, counter): if not self.stop_progress: self.ui.progressBar.setValue(counter) # 启动进度栏 def start_progressbar(self): self.stop_progress = False self.progress_value = self.ui.progressBar.value() self.progressbar_counter(self.progress_value) # 停止进度栏 def stop_progressbar(self): self.stop_progress = True try: self.run_thread.stop() except: pass # 重设进度栏 def reset_progressbar(self): self.stop_progressbar() self.progress_value = 0 self.ui.progressBar.reset() self.stop_progress = False # 字体选择 def set_font(self): self.ui.fontComboBox.activated['QString'].connect(self.ui.label.setText) class RunThread(QtCore.QThread): # 定义一个新的信号 counter_value = QtCore.pyqtSignal(int) def __init__(self, parent=None, counter_start=0): super(RunThread, self).__init__(parent) self.counter = counter_start self.is_running = True def run(self): while self.counter < 100 and self.is_running == True: time.sleep(0.1) self.counter += 1 print(self.counter) # 发出一个新值的信号 self.counter_value.emit(self.counter) def stop(self): self.is_running = False print('线程停止中...') self.terminate() if __name__ == "__main__": MainWindow()
运行代码正常:
接着,我们创建一个DragDropButton()类,用来处理按钮的拖放:
class DragDropButton(QtWidgets.QPushButton): def __init__(self, text, parent): super().__init__(text, parent) self.setAcceptDrops(True) def dragEnterEvent(self, event): if event.mimeData().hasFormat('text/plain'): event.accept() else: event.ignore() def dropEvent(self, event): self.setText(event.mimeData().text())
我们使用setAcceptDrops属性设置按钮接收拖放事件,创建一个dragEnterEvent()方法用来设置拖的事件响应,创建一个dropEvent()方法用来设置放的事件响应。
接着我们在MainWindow()主类中,调用它:
class MainWindow(object): def __init__(self): …… self.ui.pushButton.hide() self.pushButton = DragDropButton("拖放按钮",MainWindow) self.ui.gridLayout_5.addWidget(self.pushButton,0, 1, 1, 2) ……
最后,运行一下看看:
在上面的程序中,我们能够将文本拖放到按钮上。
好了python GUI库图形界面开发中PyQt5拖放控件的实例就是这些,更多关于python PyQt5 GUI库图形界面开发请查看下面的相关链接